Tagging files as 3D
In Corel VideoStudio, MVC and MPO clips are automatically detected and tagged as 3D during import. You can also tag 2D clips to simulate the 3D effect when you render the project as a 3D movie. Tagged 3D media clips are marked with 3D for easy identification and to enable the 3D media clip for 3D editing.
The Left-Right format for side-by-side 3D is a popular choice for delivering content and is used mostly in media clips imported or captured from 3D video cameras. The Right-Left option is used mostly in media clips acquired from the Web.
To tag video and photo clips as 3D
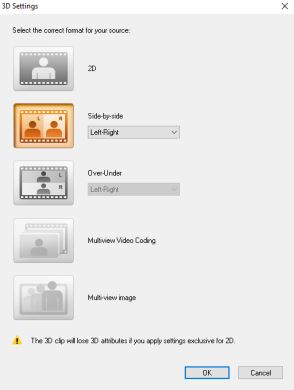
1 Right-click 3D files imported into the Library or the Timeline and choose Tag as 3D from the right-click menu. The 3D Settings dialog box is displayed.
2 Choose one of the following options to set the correct format for 3D content:
• 2D — the default setting if the selected clip is not recognized as 3D.
• Side-by-side — delivers 3D content by splitting the horizontal resolution of each frame for the left and right eye. Side-by-side 3D is widely used by cable channels for delivering content for 3D ready TV sets because of lower bandwidth usage. Choose between the Left-Right and Right-Left formats.
• Over-Under — delivers 3D content by splitting the vertical resolution of each frame for the left and right eye. The higher count of horizontal pixels makes this option more suitable for displaying panning motion. Choose between the Left-Right and Right-Left formats.
• Multiview Video Coding (MVC) — generates a high-definition two-view (stereoscopic) video or a multi-view 3D video.
• Multi-view image — delivers high-quality stereoscopic images such as Multi-Picture Object (MPO) files that are shot using 3D cameras.
3 Click OK.
The thumbnail of the media clip in the Library and Timeline now has the 3D tag.