Scanning for scenes
Scan the DV tape and select the scenes that you want to add to your movie.
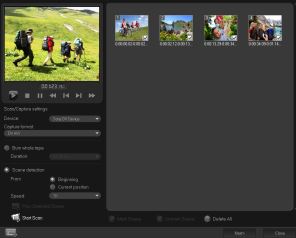
To scan for scenes
1 Connect your camcorder to your computer, and turn on the device. Set your camcorder to Play (or VTR/VCR) mode.
2 Select a recording device under Device.
3 Click the Capture format arrow to select a file format for captured videos.
4 Specify whether to burn all videos of the tape (Burn whole tape) or scan your DV tape (Scene detection).
To burn the whole tape
1 Select Burn whole tape and then specify the tape duration under Duration.
2 Click Next to apply the template and burn to DVD.
To use scene detection
1 After selecting Scene detection, choose whether to scan the tape from the Beginning or Current position.
• Beginning — Scans the tape for scenes from the beginning. The tape will automatically be rewound if the tape position is not in the beginning.
• Current position — Scans the tape for scenes from the current tape position.
2 Specify the scan speed and click Start Scan to begin scanning the DV device for scenes. Scenes are video segments that are distinguished by date and time stamps on the DV tape.
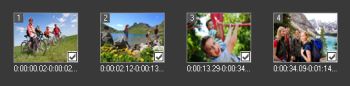
DV-to-DVD Wizard
3 In the Storyboard View, select each scene that you want to include in your movie, and click Mark Scene.
4 Click Next.
Note: To save and import the scanned file without having to re-scan it, click the
Options button

and select
Save DV Quick Scan Digest. To manage a large number of tapes, click
Save DV Quick Scan Digest as HTML. This feature lets you print the HTML file and attach it with your tapes.