Customizing the workspace
The new workspace is designed to provide you with a better editing experience. You can now customize the size of the program window and change the size and position of the elements on your screen for full control of your editing environment.
Each panel behaves like an independent window that can be modified according to your editing preferences. This is very useful when you are using large displays or dual monitors.
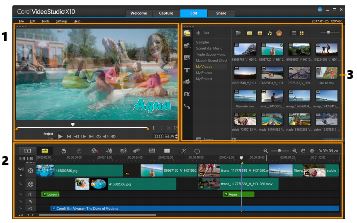
The main panels are:
1. Player panel — Contains the Preview Window and Navigation area.
2. Timeline panel — Contains the Toolbar and Timeline.
3. Library panel — Contains the media library and the Options area.
To move a panel
• Double-click the top-left corner of the Player Panel, Timeline Panel or Library Panel.
When the panel is active, you can minimize, maximize, or resize each panel.
You can also drag the panel outside the main application window into the second display area for dual-monitor setups.
To customize the size of the program window
• You can do one of the following:
• Click the
 Restore
 button and drag the ends of the program window to the desired size.
• Click the
 Maximize
 button for full screen editing.
To dock a panel
1 Click and hold an active panel.
The docking guide appears.
2 Drag your mouse over the docking guide and choose a docking position to snap the panel in place.
To save a custom workspace layout
• Click Settings > Layout Settings > Save to and click a Custom option.
To load a custom workspace layout
• Click Settings > Layout Settings > Switch to and choose Default or one of the custom settings you have saved.
You can also change the layout settings from the UI Layout tab in Settings > Preferences.
To set program preferences
• Click Settings > Preferences or press F6 to launch the Preferences dialog box.