Adding cues and chapters
Adding cues and chapters helps you to navigate through a project and allows you to place comments on your Timeline. These cue and chapter marks are used mainly as project guides or disc menu chapters and interactive links in HTML5 projects.
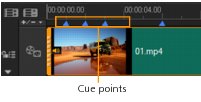
Cue points serve as markers that help in lining up media clips in a project. Chapter points specify disc menu chapters or hyperlinks.
To add project cues
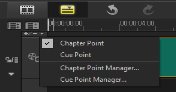
1 Click the Chapter/Cue Menu.
2 Click Cue Point.
3 Drag the cursor to where you want to add a cue point and click the bar below the Timeline ruler. Notice that a blue arrow icon is added.
4 Repeat Step 3 to add more cue points.
Note: You can also use the Cue Point Manager when adding cue points. Select Add and specify the timecode and name of cue for easy identification. Click OK and then Close.
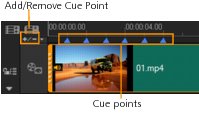
You can also add a cue point by dragging the Timeline slider to the desired cue point position in your project and clicking Add/Remove Cue Point.
To add chapters
1 Select Chapter Point in the Chapter/Cue Menu.
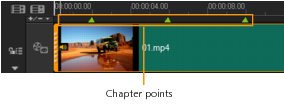
2 Drag the cursor where you want to add a chapter and click the bar below the Timeline ruler. Notice that a green arrow icon appears to indicate chapter points in your movie.
3 To edit a chapter, click on a chapter point and drag to a new position.
4 To rename a chapter, double click a chapter point and enter a new chapter name. Click OK.
To remove chapters and cues, drag the markers outside the Timeline ruler and release the mouse button. You can also drag the Timeline ruler to a chapter or cue point and click Add/Remove Chapter Point or Add/Remove Cue Point.
You can also drag the Timeline slider to the desired chapter point position in your project. Click the Add/Remove Chapter Point.